Corporate networks often use a transparent proxy or services like Zscaler to monitor and filter internet traffic. These tools usually work by intercepting SSL traffic using a custom root certificate to decrypt the traffic, inspect it, and sending it to the destination.
GitHub Copilot does not work in these networks, at least not without additional configuration. You might see errors like this in output of Copilot: unable to get local issuer certificate. This is caused by a custom root certificate not being trusted by the application.
The official Copilot documentation states that if your organization uses Copilot Business, Copilot can read custom SSL certificates installed on a user’s machine. Unfortunately, getting a Copilot Business license can be quite challenging, especially in larger corporations or government agencies that move slowly or are reluctant to invest in developer tools.
Luckily, there are some workarounds for both Visual Studio and Visual Studio Code (on Windows).
Before you start: you might want to check if using Copilot is allowed in your organization. Most organizations have strict policies on the use of AI tools.
Visual Studio Code
There are several fixes possible for GitHub Copilot in Visual Studio Code. The first one is to manually configure the proxy settings in the settings.json file. However, this is not the best solution as setting http.proxyStrictSSL to false is a potential security risk because it ignores invalid SSL certificates completely. It might also not work for certain transparent proxies.
The following configuration works for Zscalar, which runs a local client on port 9000. Add it in your Visual Studio Code settings.json file (open it by pressing F1 and search for settings json):
    "github.copilot.advanced": {
    },
    "http.proxySupport": "on",
    "http.proxy": "http://localhost:9000",
    "http.proxyStrictSSL": false, // potentially insecure
A better and easier solution (in Windows) is by using the win-ca extension. This extension makes all trusted root certificates from the Windows certificate store available to Visual Studio Code. This should work without too much hassle since most companies with a transparent proxy will have the custom root certificate pre-installed on your machine.
The steps are simple:
- Install the win-ca extension.
- Configure it by setting the injection method to
appendin the extension settings. - Restart Visual Studio Code and GitHub Copilot should work now.
Visual Studio
The GitHub Copilot extension for Visual Studio requires a slightly different approach since there is no win-ca extension available. However, there is a safe way to get it to work.
First, download the custom root certificate. An easy way to do this is using your browser. In Microsoft Edge you can download the certificate by following these steps:
- Go to https://github.com and click on the lock icon in the address bar.
- Click on
Connection is secureand click on the certificate icon in the top right corner. - Go to the details tab.
- Click on the topmost certificate in the hierarchy (the Root CA).
- Click on the
Exportbutton in the bottom-right of the dialog. - Save the certificate file and place it in a folder, for example:
c:\certs\ZScaler Root Certificate.crt.
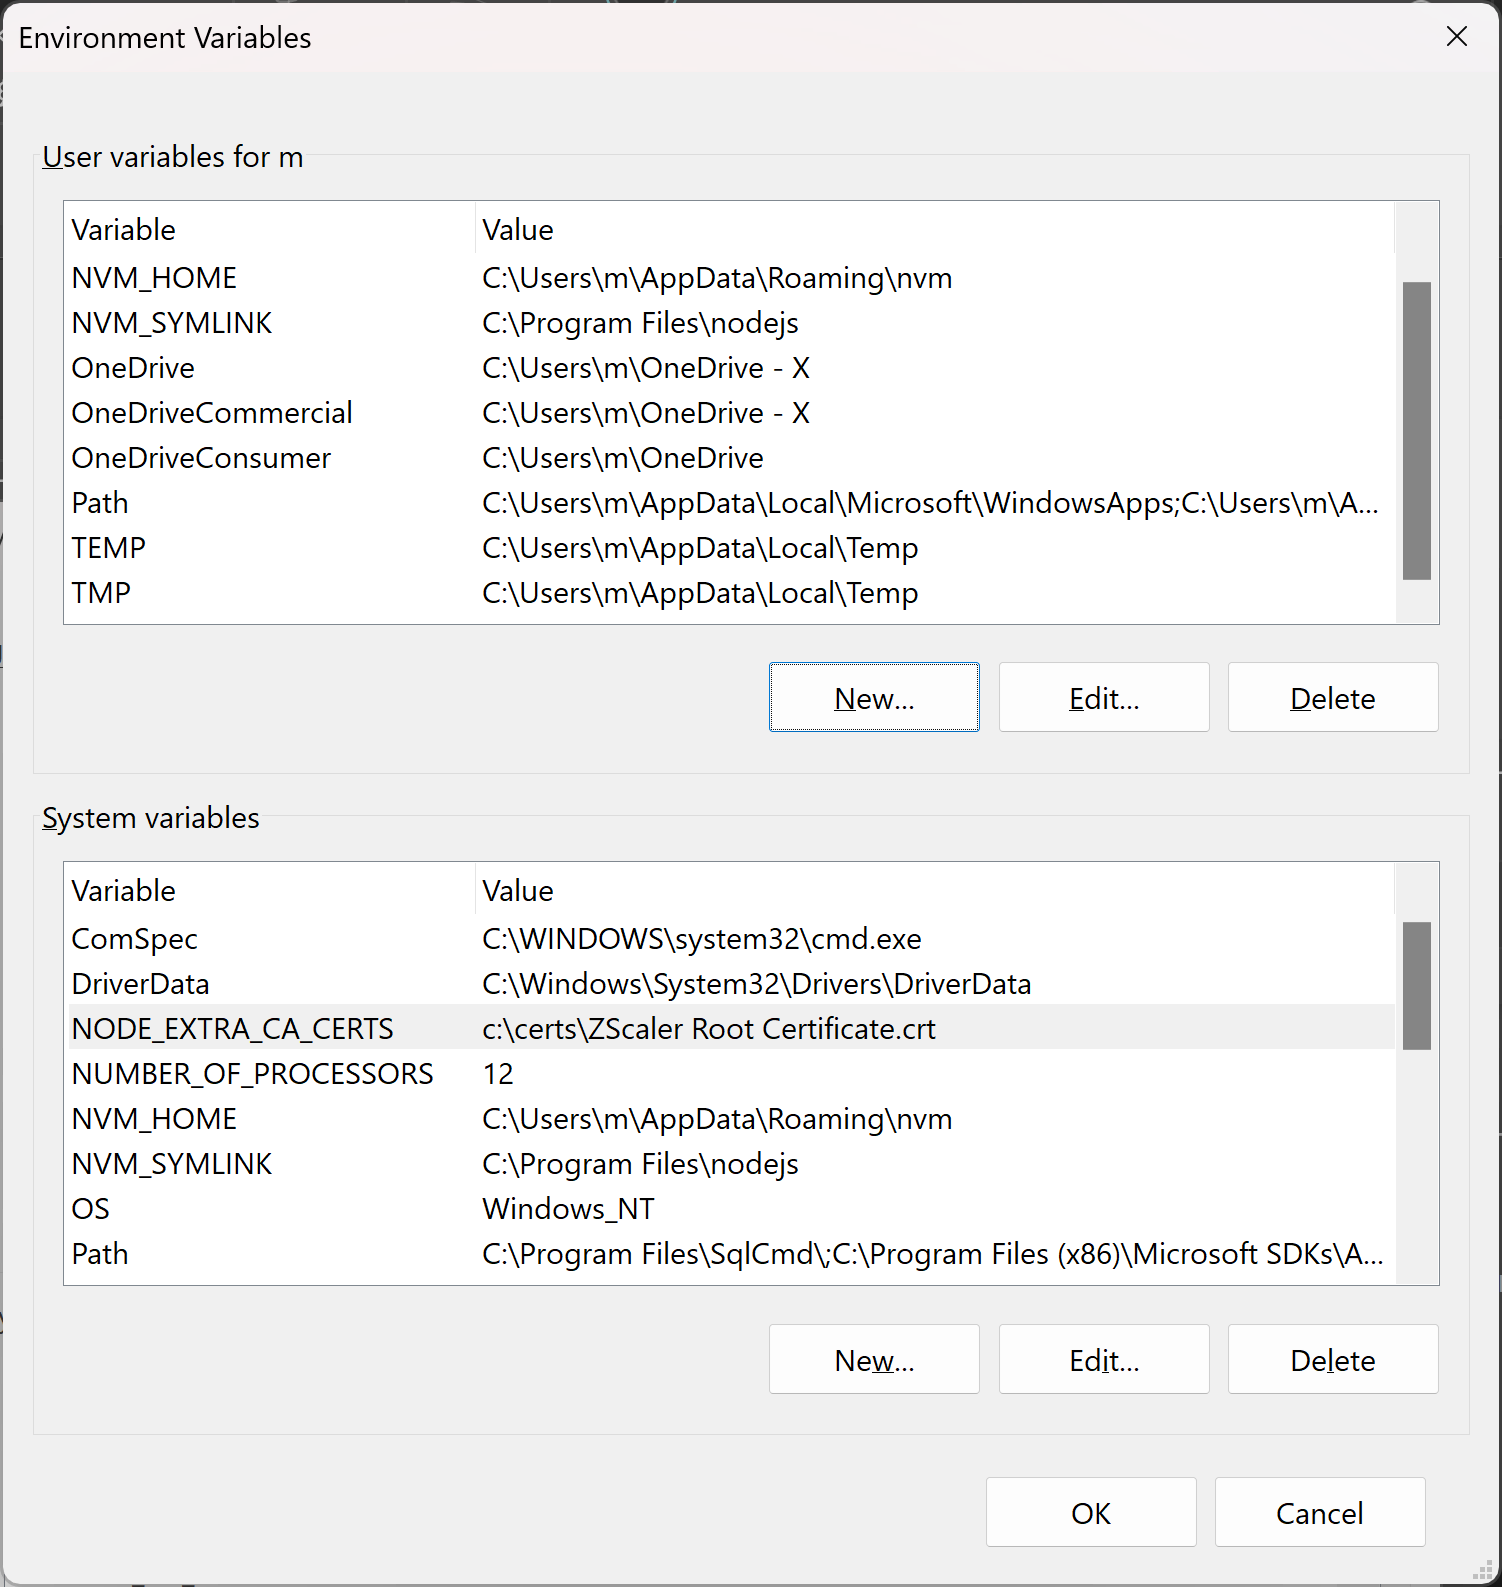
Then, open the Windows Environment Variables settings (search for it in the start menu) and add a new system variable called NODE_EXTRA_CA_CERTS with the path to the custom root certificate: c:\certs\ZScaler Root Certificate.crt

Restart Visual Studio and GitHub Copilot is good to go.
